For two years now, Bobbie Webster’s Natural Areas crew has been using the ArcGIS Collector app from Environmental Systems Research, Inc. in their vegetation inventory and management work. So far field and office methods associated with Collector are not well-documented. Beginning in Summer 2018 we are developing a listing of the resources and tasks needed to successfully complete a project using the Collector app. We chose a Door County phragmites inventory job to use as a case study.
- Prerequisite Knowledge
- Setting Up the Project On the Desktop
- Setting Up the Project In the Cloud
- Data Collection Methods and Equipment
- Mapping Phragmites Patches and Individual Plants
- Snapping and Mapping Landscape and Point of Interest Photos
- Sharing Data Collection Results – Quick and Dirty Download Method

Prerequisite Knowledge
Prerequisite Knowledge – The technician performing the work described in these pages requires a strong working knowledge of standard office computing tasks and some familiarity with desktop GIS software. The technician also needs to be authorized to access the necessary drives and folders on the University computer network.
- Knows the purpose and function of file management software. Knows how to perform basic file management tasks in Windows File Explorer. Necessary skills include viewing the drive list and folder tree, analyzing drive space, mapping network drives, adding new folders, moving folders and files, renaming folders and files, copying folders and files, etc.
- Has write access to the \_NaturalAreasGeoData folder on the University’s \\fpsb\ecodata server.
- Knows how to prepare the folder tree for the files that will be created by GIS software
- Knows how to open an untitled map document in ArcGis Desktop
- Knows how to open an existing map document in ArcGis Desktop
- Knows how to use the Catalog window in ArcGis Desktop to get a GIS view of the folder tree.
- Knows how to create a new map document (mxd file extension) in ArcGis Desktop, set it to use relative path names and save it to it’s planned location.
- Knows how to select the appropriate Coordinate System for shapefile and geodatabase feature classes.
Note that some folks are stepping up to ArcGIS Pro. Requirements are similar to those for ArcGIS Desktop. The output file has an aprx extension.
Setting Up the Project On the Desktop
Create A Project Folder – Project files created and edited with desktop software are stored on the Ecodata Drive, a portion of the University computer network allocated to the Biodiversity Center for their active project files. Use Windows File Explorer to map the Ecodata Drive and display the contents of the R:\_NaturalAreasGeoData folder. If the subfolder ToftRidgesPhrag2018 hasn’t been created yet, create it now.
Create A Project Map Document – When creating and updating the files needed to support a mapping project, it’s best to use a map document (mxd extension) dedicated to those activities. Use Windows File Explorer to view the contents of the R:\_NaturalAreasGeoData\ToftRidgesPhrag2018 subfolder. If the ToftRidgesWorkspace.mxd map document hasn’t been created yet, use ArcMap to create it now. Before saving the document to the project folder, configure it to store relative pathnames to data sources.
FOLLOW UP QUESTION: Do/don’t designate a default database
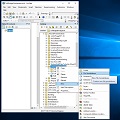 Create A Project Geodatabase – When running the Collector App, the mobile worker is using one of the project’s editable feature classes to store data. An editable feature class that is being used for data collection resides in the cloud but it’s important to keep in mind that it started life on the desktop in a geodatabase that serves as a “container” for the project’s feature classes. So the first step in creating the feature classes that will be needed for a project is creation of the container that they will be stored in. Use Windows File Explorer to view the contents of the R:\_NaturalAreasGeoData\ToftRidgesPhrag2018 subfolder. If the ToftRidgesPhrag2018a.gdb geodatabase hasn’t been created yet, use the Catalog Window in ArcMap to create it now.
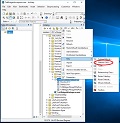
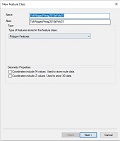
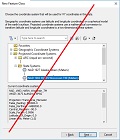
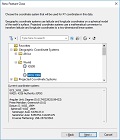
Create An Editable Feature Class For Polygon Features – The project’s mobile workers will be mapping some phragmites patches that are best represented by polygons. Of course the data structure they will be writing to resides in the cloud, but before it gets to the cloud, it needs to be created on the desktop. Use the Catalog Window in ArcMap to view the contents of ToftRidgesPhrag2018a.gdb. If the ToftRidgesPhrag2018aPoly01 feature class hasn’t been created yet, create it now. Note that we’ve retracted our original recommendation regarding the feature class coordinate system. We started out with a projected CS, in this case Wisconsin Transverse Mercator. Later, we figured out that a geographic CS is a much better choice. WGS 84 should have been used on this project and should be the standard for all the Biodiversity Center’s field mapping work. There are two more “New Feature Class” screens in addition to the two shown below. We’re not really sure what they’re for, but leaving the default settings has worked out OK so far.
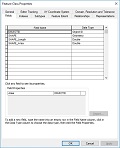
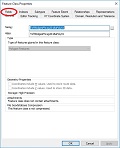
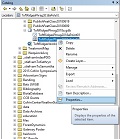
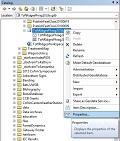
Define the First Field In the Polygon Feature Class – We know that the mobile workers will need to record whether or not a patch of phragmites is native or invasive. The first step in setting up the project to meet the need to record species information is creation of a data field named SPECIES in ToftRidgesPhrag2018aPoly01. We do this by modifying the feature class properties.
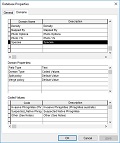
It’s often beneficial to list some or all of the values that mobile workers will enter in a data field. That’s the case with the SPECIES field where we’ve set it up so mobile workers can look up the species name for the plant they are mapping and enter it into the database (spelled correctly) with one keystroke. So there’s a place in the feature class properties for us to store a list of allowed values for the SPECIES field. Right? Wrong! The list of allowed values (called a “domain”) is a property of the geodatabase, not the feature class.
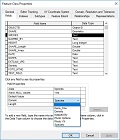
So now we have a field in our feature class for entering species information and we have a list of allowable species values in the geodatabase. We now need to modify the feature class properties so it knows to use the SPECIES domain to control what can and can’t be entered in the SPECIES field.
Define Additional Fields in the Polygon Feature Class – Develop the feature class to accommodate the full range of conditions that mobile workers will need to deal with. This includes adding new fields as needed and domains may also need to be added and/or tweaked.
Create Additional Editable Feature Classes – Develop the project geodatabase to accommodate the full range of conditions that mobile workers will encounter. A second editable feature class, ToftRidgesPhrag2018aPoint02, was added to the project geodatabase to faciliate mapping of individual plants.
Setting Up the Project In the Cloud
We’re trying out some ideas that we hope will allow us to stay organized.
- As of June 2018, Bobbie Webster will be the owner of ArcGIS Online content that pertains to management activities on UWGB’s natural areas.
- We are setting up a separate ArcGIS Online folder structure for natural areas content. Going forward that stuff will all be kept in project-specific subfolders in Bobbie Webster’s AGOL account.
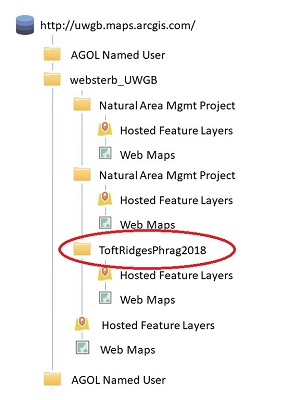
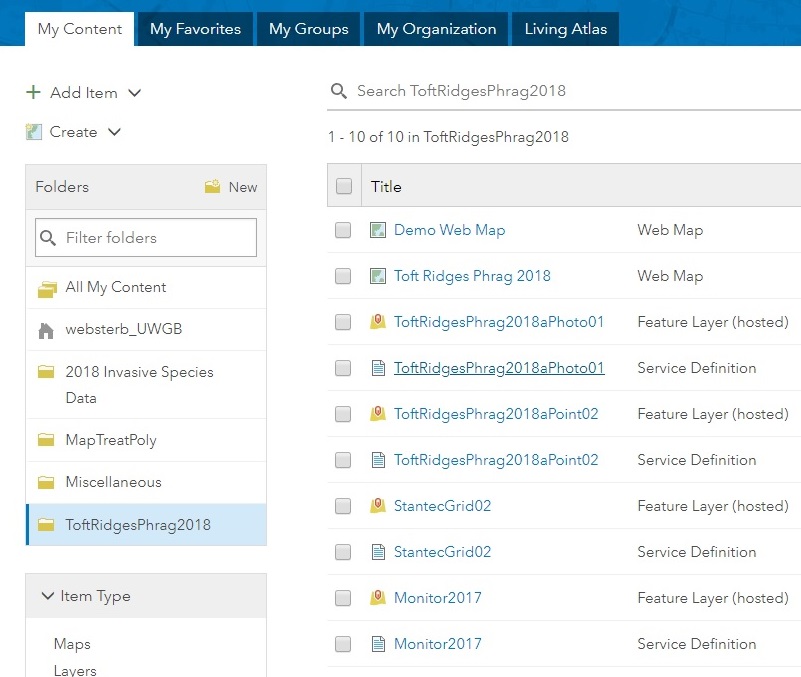
Create A Project Folder – The folder ToftRidgesPhrag2018 has been added to Bobbie’s AGOL account as shown at right. As the project has progressed items have been added to the folder. Status as of 14-jul-2018 is shown below.
Data Collection Methods and Equipment
The project utilizes a mobile application called Collector for ArcGIS to record the results of phragmites monitoring work at the Toft Point/Ridges Sanctuary wetland complex. The app is customized to assist with several tasks central to the project:
- Mapping the footprint of each phragmites patch as a feature in a polygon feature class. Populating the fields in the feature class attribute table with the values for the patch.
- Mapping the location of each individual phragmites plant as a feature in a point feature class. Populating the fields in the feature class attribute table with the values for the plant.
- Mapping the vantage point for each photo acquired in support of vegetation mapping tasks as a feature in a point feature class. Populating the fields in the feature class attribute table with the values for the photo. Storing the image file for the photo as an attachment to the feature class.
Offline Editing – Collector does it’s thing by allowing mobile workers (the term used in Esri support documents) to add new features to editable feature classes that have been published to the cloud via the ArcGIS Online web GIS. There are three basic configurations to choose from:
- Connected editing via a cell phone service
- Connected editing via local wifi
- Disconnected or “offline” editing
The first two options are the most elegant, but are very seldom feasible for natural resources mapping work. Because the project that is the subject of this case study is being done on a site that lacks reliable cell phone service and is too large to be covered by local wifi it’s been set up for disconnected editing.
Equipment – Biodiversity Center Tablet – The default equipment configuration for the project includes the iPad Mini 4 owned by the Biodiversity Center. The tablet doesn’t have a phone chip or data plan which would seem to be a problem, but turns out to be a non-issue since we’ve already opted for disconnected editing. To compensate for the fact that the tablet doesn’t have a GPS chip, the equipment configuration includes a remote GPS receiver (Garmin GLO). The receiver sends its position fixes to the iPad via Bluetooth.
Equipment – Camera – There has been some discussion of using one of the Biodiversity Center’s point-and-shoot digital cameras on the project. As of 23-jun-2018 we are going forward using the iPad’s built-in camera
Equipment – Individually-Owned Phones and Tablets – our mobile workers have expressed an interest in using their personal mobile devices to collect field data for Biodiversity Center projects.
- The Arc Collector app is free to acquire and easy to set up on a phone or tablet.
- A phone is easier to lug around than the iPad assigned to the project
The idea has significant drawbacks. As of June, 2018 we’ve ruled out use of personal mobile devices on Biodiversity Center projects:
- the mobile device owner may incur data charges depending on his/her data plan
- the mobile device owner may incur data charges depending on proximity to a wifi source
- the GPS configuration used by the Biodiversity Center’s tablet (GPS locations received via Bluetooth from GLO remote GNSS receiver) is inherently more accurate than GPS capability built-in to a phone or tablet.
Equipment – Compass – Part of the data collection work for this project involves recording the view direction of landscape photos. An old fashioned (magnetic) compass is the best tool for this task.
Mapping Phragmites Patches and Individual Plants
Mobile workers choose from several methods depending on site conditions and whether or not the plant(s) to be mappd occurr as a patch or as isolated individuals.
Mapping A Phrag Patch Using GPS Mapping – Phrag patches are mapped to the ToftRidgesPhrag2018aPoly01 Feature Class. The default method, GPS mapping, is a two person operation. The lead worker carries the remote GPS receiver around the perimeter of the target patch. He/she stops periodically and signals the person with the tablet to mark a vertex point. The lead worker has a number of responsibilities that have a direct bearing on the quality of the final product. He/she:
- makes sure that the marked points are close enough together to define a polygon whose footprint coincides roughly with the location and shape of the target patch.
- carries the receiver in a way that it has a view of the entire sky
- makes sure that the person carrying the tablet stays close enough to maintain the Bluetooth connection with the receiver
Mapping A Phrag Patch Using Screen Digitizing – An alternative method for adding a phrag patch to the ToftRidgesPhrag2018aPoly01 Feature Class consists of zooming to the patch on an air photo and “tracing” its outline on the screen. The screen taps used to trace the patch need to be close enough together to define a polygon whose footprint coincides roughly with the location and shape of the target patch. In general this method is not being used on the Toft/Ridges project.
Mapping An Individual Phrag Plant – Individual phrag plants are mapped to the ToftRidgesPhrag2018aPoint02 Feature Class. The default method, GPS mapping, is similar to the GPS-based method described above for polygons.
Snapping and Mapping Landscape and Item-Of-Interest Photographs
Past work at the Toft-Ridges wetland complex has included acquisition of ground-level photos – SEE SOME EXAMPLES from 2016.
The current project includes shooting some photos “for the record” as well. It seems like the Collector app should work well for storing and documenting field photography (assuming that the mobile device’s camera is good enough for the needs of the project). The ToftRidgesPhrag2018aPhoto01 Feature Class has been set up for mapping and storing photos shot with the tablet.
Landscape Photos – when a polygon representing a phrag patch has been added to the polygon feature class, the team may decide that one or more landscape photos would make for more complete documentation of the patch. Once they have moved into position for the first photo, the lead worker elevates the remote receiver so it has a view of the entire sky. The person carrying the tablet takes it from there. He/she:
- Marks and stores the location of the vantage point for the first photo
- frames up and shoots the photo
- uses a magnetic compass to determine the camera bearing for the photo and enters the value in the attribute table
Item of Interest Photos – Mobile workers can encounter unexpected objects and conditions in the course of collecting natural resources data. We tried to configure the Toft/Ridges application to make it easier to document unusual conditions. Once the team has identified a target and moved into position to photograph it, the lead worker elevates the remote receiver so it has a view of the entire sky. The person carrying the tablet takes it from there. He/she:
- Marks and stores the location of the vantage point for the photo
- frames up and shoots the photo
- Fills in the NOTES field as needed
Sharing Data Collection Results – Quick and Dirty Download Method
Data collection at the Toft Ridges site was complete in Early July and it was important to share the results with Ridges staff sooner rather than later. Let’s assume Clint Raymond has been assigned to grab the spatial and tabular data from the cloud, get rid of the stuff that doesn’t pertain to the Toft-Ridges project and repackage it for use on the Ridges’ Desktop GIS software.
Create A Workspace On A Secure Drive – The process begins with a sequence of routine File Manager and ArcMap tasks:
- Create a new folder specifically to serve as a workspace for the download and file-fixing activities
- Create a new map document by opening ArcMap and saving the untitled .mxd to the newly created folder under some kind of an informative name. We’ve used DownloadWorkspace.mxd for the case study
- Add a basemap to the map document data frame. The Imagery basemap available via the Add Data icon will work fine.
- Open the Map Document Properties popup, check the “Store relative pathnames to data sources” box, click OK to close the popup and save the map document again.
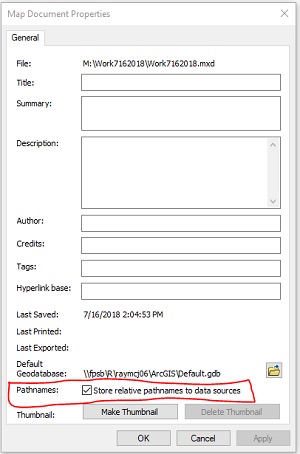
Display the Feature Class(es) Containing the Data – It turns out that the ToftRidgesPhrag2018aPoly01 feature class contains all the information needed in the short term. The publisher of that feature class shared it with the VEG MAPPING GROUP. Clint is a member of the group, so when he is signed in to AGOL, he’ll be able to find it in the cloud and display it in his workspace.
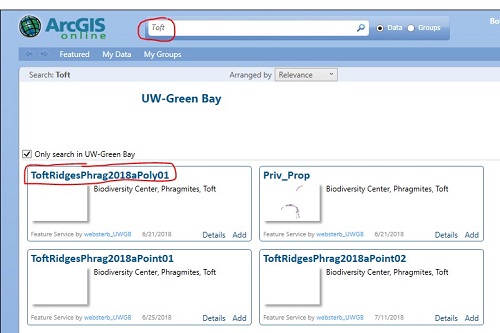
- A feature class can be displayed from the cloud (ArcGIS Online) by using the “Add Data” feature at the top of your Desktop screen. If the user is not signed in to ArcGIS Online, he/she will be required to
- The name of the feature class can either be copied and pasted into the search bar or you can type in words from the feature class to help find it. In this case typing “Toft” into the search bar was enough information for us to find our layer.
- Display the feature class in the Table of Contents by clicking Add. Even though the data is physically in the cloud, it is now viewable in ArcMap.
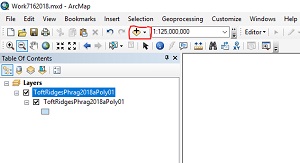
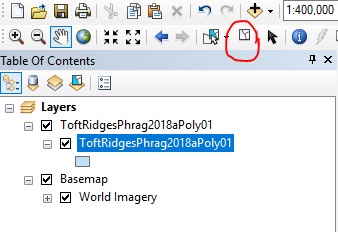
Make A Shapefile Copy of the Feature Class On the Desktop – When manipulating GIS data, it’s good practice to keep a copy of what the data looks like before any geoprocessing operations were applied to it.
- Use the Clear Selected Features button (shown at right) to make sure that no records are accidentally left behind
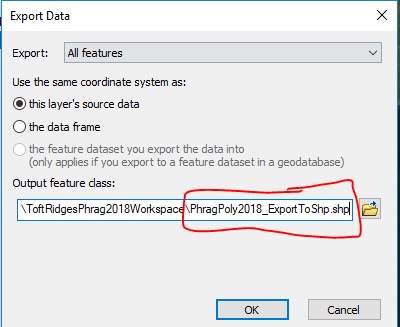
- Export the cloud version of the data to a shapefile in the project folder using an informative filename. For the case study we’ve gone with filenames that indicate the purpose of the file. In this case we named it PhragPoly2018_ExportToShp.shp.
- When the export is complete, respond “yes” to the “Do you want to add …” popup, remove the cloud version of the feature class from the Table of Contents and save the map document
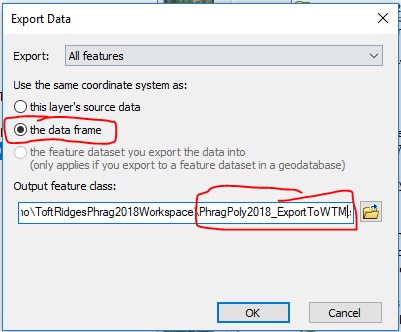
Make a Copy of the Shapefile With the Specified Coordinate System – Early in the project, it was agreed that the results would be published using Wisconsin Transverse Mercator.
- Use the Clear Selected Features button to make sure that no records are accidentally left behind
- Open the Data Frame Properties window. It is accessed from a drop-down menu displayeded by right-clicking on Layers at the top of the Table of Contents. Select the Coordinate System tab, then Projected Coordinate Systems, then State Systems, then NAD 1983 HARN Wisconsin TM (Meters). Close the window by clicking OK and save the map document again.
- Export the shapefile to the download workspace using an informative filename. For the case study we’ve gone with filenames that indicate the purpose of the file. In this case we named it PhragPoly2018_ExportToWTM.shp
- When the export is complete, respond “yes” to the “Do you want to add …” popup, remove PhragPoly2018_ExportToShp from the Table of Contents and save the map document
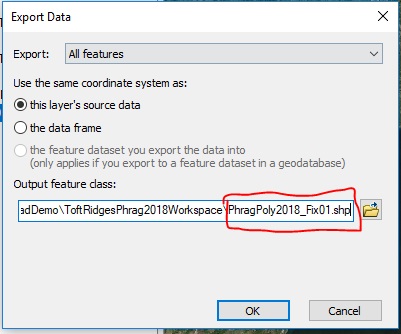
Make a Copy of the Shapefile For Clean-Up Edits – The initial download version of the file is very seldom OK to use as-is. We can assume that there will always be some cleanup needed at the end so we do those edits on a copy of the shapefile created specifically for the purpose.
- Use the Clear Selected Features button to make sure that no records are accidentally left behind
- Export PhragPoly2018_ExportToWTM.shp to the download workspace using an informative filename. For the case study we’ve gone with filenames that indicate the purpose of the file. In this case we named it PhragPoly2018_Fix01.shp
- When the export is complete, respond “yes” to the “Do you want to add …” popup, remove PhragPoly2018_ExportToWTM from the Table of Contents and save the map document
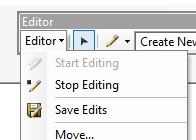
Prepare Shapefile Final Version – Make corrections as needed.
- Open PhragPoly2018_Fix01.shp for editing by right-clicking on its name in the Table of Contents and selecting Edit Features. If the editor toolbar is not already visible, it will pop up somewhere. Park it somewhere in the toolbar area near the top of the screen.
- Open the shapefiles’s attribute table by right-clicking on its name in the Table of Contents and selecting Open Attribute Table.
- First look for and delete records that don’t belong in the final product. There are all kinds of batch delete tools but rookies are better off selecting the candidates for deletion one at a time and using the Delete Selected tool
- This is also an opportunity to check for and fix typos and data errors
- Consider deleting fields that are not useful to the end user. This generally not a good idea but sometimes helpful if the table is overly messy.
- Open the Editor dropdown from the Editor Toolbar and select Save edits, then Stop Editing.
*******************************************************************************************
For two years now, Bobbie Webster’s Natural Areas crew has been using the ArcGIS Collector app from Environmental Systems Research, Inc. in their vegetation inventory and management work. So far field and office methods associated with Collector are not well-documented. Beginning in Summer 2018 we are developing a listing of the resources and tasks needed to successfully complete a project using the Collector app. We chose a Door County phragmites inventory job to use as a case study.
- Prerequisite Knowledge
- Setting Up the Project On the Desktop
- Setting Up the Project In the Cloud
- Data Collection Methods and Equipment
- Mapping Phragmites Patches and Individual Plants
- Snapping and Mapping Landscape and Point of Interest Photos
- Sharing Data Collection Results – Quick and Dirty Download Method

Setting Up the Project In the Cloud

We’re trying out some ideas that we hope will allow us to stay organized.
- As of June 2018, Bobbie Webster will be the owner of ArcGIS Online content that pertains to management activities on UWGB’s natural areas.
- We are setting up a separate ArcGIS Online folder structure for natural areas content. Going forward that stuff will all be kept in project-specific subfolders in Bobbie Webster’s AGOL account.
********************************************************************************************
