Example – AISphragPhotoPtMaster.shp
We’re using this job to illustrate some important database development practices
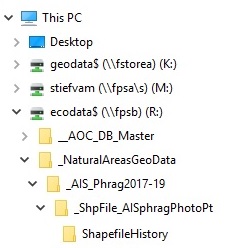 CREATE A DEDICATED WORKSPACE – The picture on the right illustrates the folder structure
- The workspace folder name starts with “_ShpFile…” to indicate a database development workspace
- The workspace folder contains an empty subfolder titled “ShapefileHistory”
CREATE A DEDICATED MAP DOCUMENT (.mxd) – This map document is only used to create/edit AISphragPhotoPtMaster.shp.
- Open a new map document in ArcMap and use “Save as” to put it in the workspace folder. The file name is not critical but leaving it untitled can cause confusion down the road. For this demo we’ve named the map document “photopointWorkspace.mxd”
- Check and save the “Store relative pathnames to data sources” setting in the Map Document Properties Dialogue (under File in the ArcMap Main Menu)
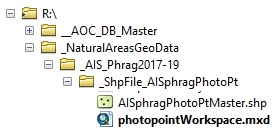 CREATE THE NEW SPATIAL DATABASE – The picture on the right illustrates the folder structure
- Open the ArcCatalog window (not the stand-alone program) and create a new shapefile in the workspace folder. Name the shapefile consistent with Biodiversity Center file management practices, In this case “AISphragPhotoPtMaster.shp”
- Use Add Field to create a 50-character text field named IMG_SOURCE
- Use Add Field to create a 50-character text field named IMG_FILNAM
- Use Add Field to create a 100-character text field named RAW_DATE
- Use Add Field to create a 50-character text field named FIX_DATE
- Use the Add XY Coordinates tool to create the fields named POINT_X and POINT_Y. The tool is found in ArcToolbox under Data Management Tools – Features
- Use Add Field to create a 50-character text field named IMAGE_ID – This is the so-called “Key Field” for the database. It is constructed in a way that its value is unique, even if jpegs get added to the image collection whose IMAGE_FILNAM duplicates that of earlier entries.
- Use Add Field to create a 100-character text field named USER_TEXT
USING THE APPEND TOOL TO ENTER DATA – this content is under construction
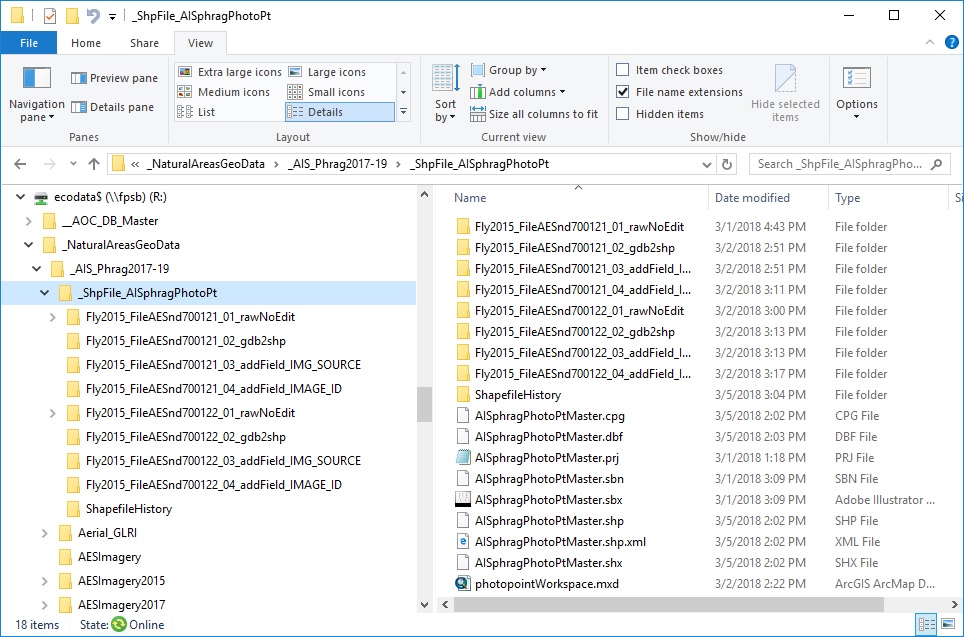
CLOSING OUT THE EDITING SESSION – Say we’ve just finished a set of edits to AISphragPhotoPtMaster.shp. If the Editor was being used, we’ve closed it. We’ve also closed the map document (.mxd file) that we had been using. Here’s what the workspace looks like
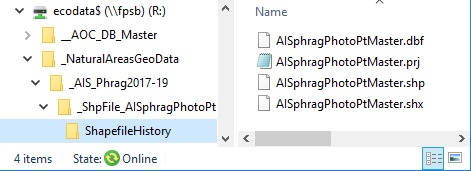 SAVING A COPY OF THE DATABASE – Now consider this. The contents of our master shapefile have changed between the just-finished editing session and earlier sessions. What happens if we screwed something up and need to get at an earlier version of the master? We’re experimenting with a procedure to address that situation. It starts when the person doing data entry decides that it’s time to make a copy. He/she copies the shapefile to the clipboard and pastes it into the ShapefileHistory folder. We strongly suggest that only the shapefile core be copied (dbf, prj, shp and shx files). If there are no older copies of the shapefile in the folder, the operation ends there. When viewed in Windows File Manager, the contents of the Shapefile History folder will be as shown above
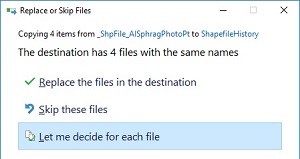 SAVING SUBSEQUENT COPIES OF THE DATABASE – If the Paste operation determines that the ShapefileHistory folder already contains a copy of the database, ArcMap displays the “Replace or Skip Files” dialogue. Select the “Let me decide for each file” option
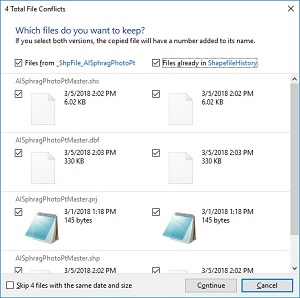 ArcMap displays the “Which files do you want to keep” dialogue. Before hitting Continue, check the box labeled Files from located in the upper left corner of the dialogue and the box labeled Files already in located in the upper right corner of the dialogue
 After the copying operation runs to completion, the contents of the ShapefileHistory folder will be as shown above. Notice that a “(2)” has been automatically appended to the filename. When a third copy is made it will get a “(3)” and so on. So far we like how this approach is turning out. We don’t have to figure out (or type) file names and our archive winds up in order according to the age of the copy.